vCloud Automation Center: vCAC 5.2/6.0: Custom Hostnaming Extension v3.1
Overview One of the most frequent asks when using vCAC is, "How do I deploy machines using my company''s hostnaming standards automatically using vCAC?" Si

From the archive. Originally published on dailyhypervisor.com on February 27, 2014.
Overview
One of the most frequent asks when using vCAC is, "How do I deploy machines using my company''s hostnaming standards automatically using vCAC?" Since the out-of-the box hostnaming only provides a way to do prefix-suffix, the answer to this question usually is that it will require customization. This solution is intended to provide a way to implement this functionality by using a small, highly versatile custom extension which can handle 95% of use cases without writing custom code. The rest of this article contains instructions on installing and configuring the vCAC Custom Hostnaming Extension. This extension allows administrators to model very specific custom hostnaming schemes for their vCAC virtual machines, multi-machine services, and vCloud Director vApps using vCAC custom properties, with dynamic creation of stock machine prefixes and index tracking for each unique hostname combination. This extension is proof-of-concept or demo grade. While it runs well and consistently, it has not been put through a formal quality assurance process, so please use with caution. Please see the disclaimer and other information in the readme.txt file in the package.
Changelog
v4.0 For v4.0, which is compatible with vRA 7, go to the following link: https://echoesofthemachine.com/vrealize-automation-custom-hostnaming-extension/ v3.1
- Resolved reprovisioning issue so that the machine will no longer be renamed
- Fixed compatibility with VirtualMachine.Admin.NameCompletion property
- Simplified installation and configuration
- Refactored the workflows for much more modular design
v3.0
- Ported to vCenter Orchestrator
- Added check for existing VM with same name (if exists, will increment)
- Added ability to leave out the index number for the first instance of a name
- Solved concurrency issues which caused duplicate names when requesting more than one of the same blueprint
v2.0
- Added support for vCloud Director vApps
- Added dynamic Machine Prefix creation and tracking for every unique combination (this affects configuration, so please read if you''re coming from version 1.0)
v1.0
- Initial release
Download
vCAC Custom Hostnaming Extension 3.1
Installation
These installation instructions assume the following:
- You have a working vCenter Orchestrator in your environment.
- You have a working knowledge of administering vCO.
- The vCloud Automation Center 5.2 or 6.0 plugin for vCO has been installed, and a vCAC host has been added.
- You have the vCenter Orchestrator instance configured as an endpoint in vCAC.
- vCAC 5.2 or 6.0 is preconfigured with at least one working Blueprint. Two individual Blueprints and a Multi-Machine Service Blueprint are better in order to see the full functionality.
Follow the steps below to perform the installation:
- Download com.dailyhypervisor.vcac.customhostname.package from the link above and copy it onto the local filesystem of the system where you will run the vCenter Orchestrator client.
- Import com.dailyhypervisor.vcac.customhostname.package into your vCO instance.
- Run the workflow Daily Hypervisor > vCAC > Custom Hostname > Install custom hostname extension.
- Choose the vCAC host where you''d like to install the extension and click Submit.
- Follow the instructions described by the workflow to download and install the external workflow XML file into vCAC.
Configuration
To configure vCAC to use the custom hostnaming extension, perform the following steps:
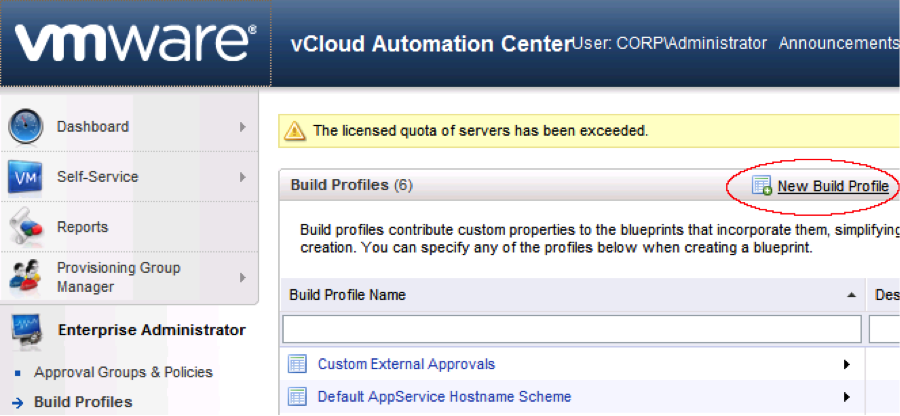
- Go to Enterprise Administrator > Build Profiles.
- You will now have all of the custom hostnaming extension properties in your Build Profile. Below is an explanation of each property. Custom.Common.SetCustomHostname.Execute The existence of this property triggers the custom hostnaming workflow to run. This must be specified to leverage the extension’s functionality. Note: The value is set to “true” by default, but this is just aesthetic. Setting it to “false” will not stop the workflow from running. This property only needs to exist to trigger the workflow, regardless of its value. Custom.Common.ComponentMachine.HostnameString This property’s value represents the hostnaming scheme you are using for a component or single machine. The format of this string looks something like this: {part1}-{part2}-{##}-vm. The parts enclosed in curly brackets represent the name of a custom property whose value you’d like to plug in to that slot. The ## indicates that you would like a two digit auto-incrementing index placed in that slot. Anything not in curly brackets is placed in the hostname as-is. Custom.Common.AppService.HostnameString This property is identical to the one above, except that this scheme gets applied to a multi-machine service or vCloud Director vApp instead of a component or single machine. Custom.Common.ComponentMachine.NoIndexOnFirst Adding this property and setting the value to "true" causes the workflow not to add the index to the hostname on the first instance of each unique name. Custom.Common.AppService.NoIndexOnFirst This property is identical to the one above, except that it applies to a multi-machine service or vCloud Director vApp instead of a component or single machine. Custom.Common.Hostname.OwnerShortNameIdentifier If this property is specified, it indicates to the custom hostnaming workflow that this value is the identifier of the part of the hostname string where the short username (no domain and backslash) of the owner should be placed. For instance, if you specified this property with a value of USR, any part of the hostname string where {USR} is specified will be replaced with the owner’s short username.
- Let’s configure an example custom hostname scheme to get a working understanding of the functionality. We will build a single machine hostname scheme. The next step is to refine the property set in our build profile.Since we are configuring for a single machine, delete the Custom.Common.AppService.HostnameString and Custom.Common.AppService.NoIndexOnFirst properties altogether.
- Also, let’s exclude the owner short username and index removal functionality for this example, so delete Custom.Common.Hostname.OwnerShortNameIdentifier and Custom.Common.ComponentMachine.NoIndexOnFirst.
- This scheme has four parts: a location identifier, a group identifier, an application identifier, and an auto-incrementing index, respectively.
- Use LOC for location, GRP for group, and APP for application.
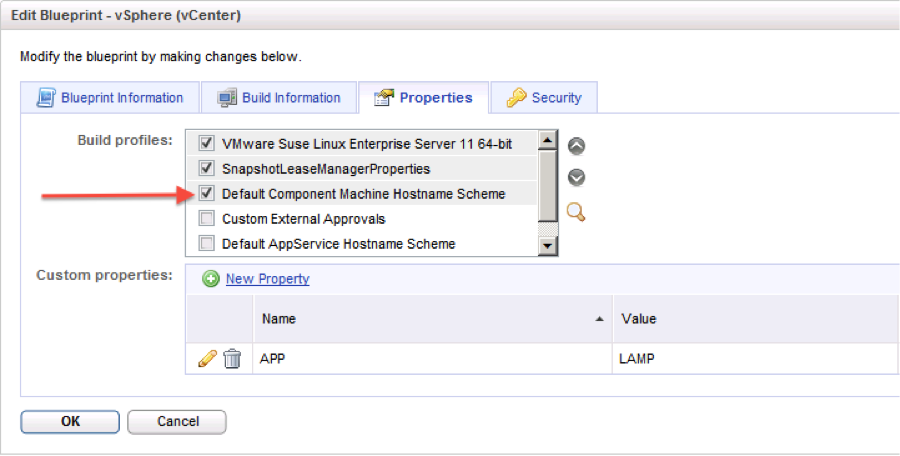
The APP identifier’s value will be unique to the Blueprint. So I went to my Apache Web Server Blueprint, created a property named APP, with a value of LAMP. Also, be sure to select the Build Profile we created in order to tie the hostname string and workflow trigger property to builds from this Blueprint.
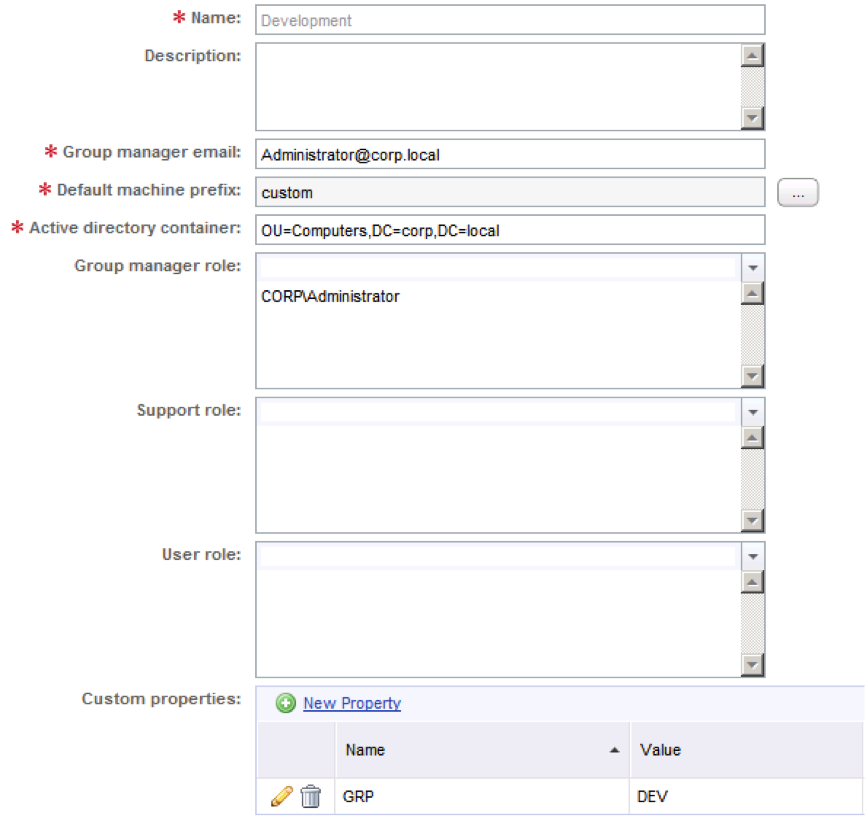
Group will be specified at the provisioning group level, so in my Development Provisioning Group, I created a property named GRP with the value DEV.
Now we need to configure the custom properties for each variable identifier in the string. Location ties most closely to the Compute Resource or Reservation, so let’s take advantage of the custom property hierarchy and specify it there.
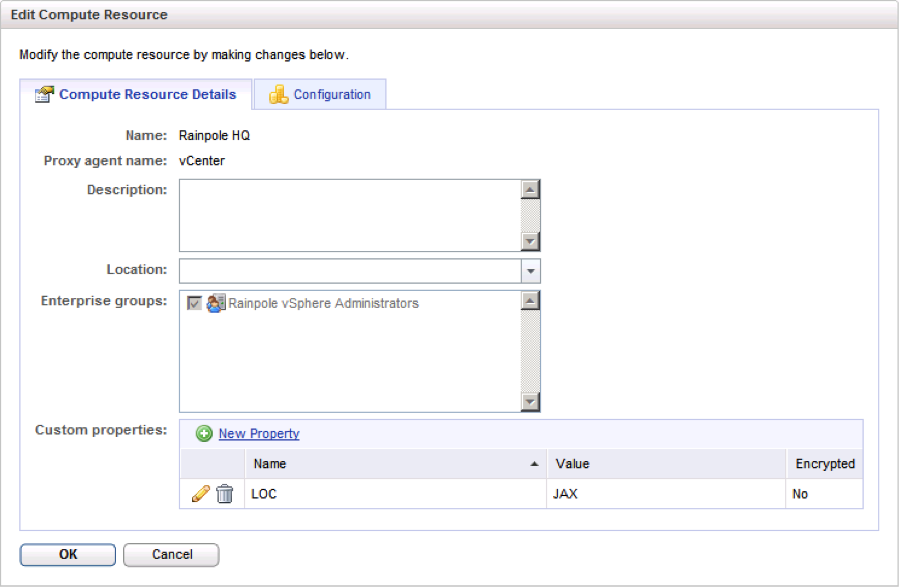
I set LOC (our location identifier) to JAX to represent Jacksonville.
Edit the Custom.Common.ComponentMachine.HostnameString property value to model the following use case:Your hostname string should look like this: {LOC}{GRP}{APP}{###}. Name your Build Profile. You will end up with a new Build Profile as shown below.
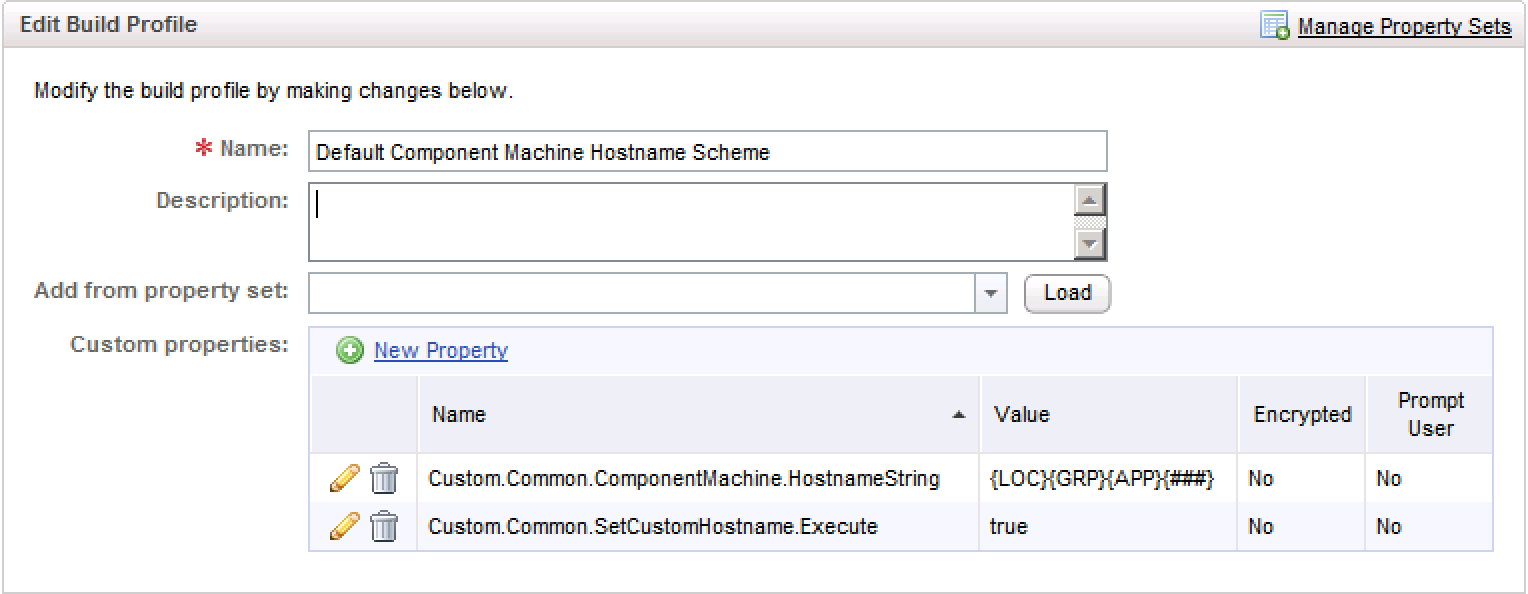
On the New Build Profile page, click the drop down for “Add from property set”, and choose our new custom hostname property set. Click Load.
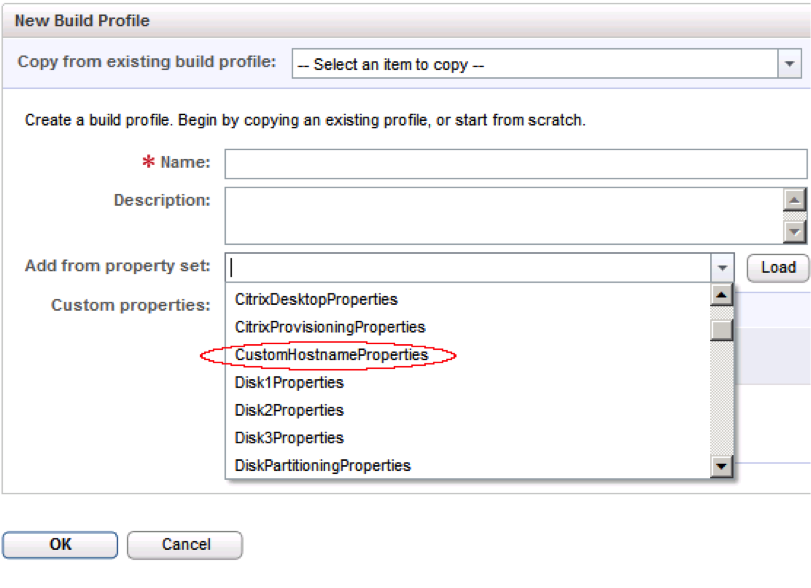
Click on New Build Profile.
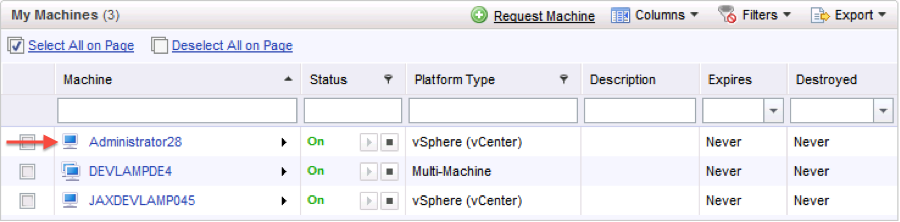
By putting three # symbols in for the index, we are indicating that is will be three digits. Since it will be the first time using this hostname combination, the extension should dynamically create a new Machine Prefix, and the index should start at 001 and increment from there. So, if I request an Apache Web Server on the Jacksonville Compute Resource, as a member of the Development group, my end result should be…
JAXDEVLAMP001
A test reveals that the custom hostnaming extension does its job.

Custom Multi-Machine Service and vCloud Director vApp Naming
Custom multi-machine service and vApp naming works in an almost identical way. However, there are two differences to note.
- It uses a different hostname string property. Instead of Custom.Common.ComponentMachine.HostnameString as in our previous example, the workflow looks for Custom.Common.AppService.HostnameString. The reason for this is to allow component machines to have different naming schemes than their parent. Component machines inherit properties from the parent multi-machine service or vApp, and when the same property is specified on both levels, the parent property overrides that of the component machine. Therefore, without separate properties, component machines would be forced to implement the same hostnaming scheme as the parent multi-machine service or vApp.
- Multi-machine services do not inherit all of the same properties as component machines. Namely, they do not inherit properties from placement entities, such as Compute Resources and Reservations. This is because multi-machine services themselves do not reside anywhere or consume resources. They are simply a logical grouping of actual machines. The component machines are the ones that are actually placed on infrastructure, and it’s possible to configure a multi-machine service with component machines that can or will end up on different resources, even in different locations. So it becomes impossible to logically tie multi-machine services to singular infrastructure. vApps, on the other hand, do support locations, as vCloud Director and vCAC both consider them as located in the organization vDC, along with their component virtual machines.In other words, if you were to use the value of Custom.Common.ComponentMachine.HostnameString in our previous example as the value of Custom.Common.AppService.HostnameString in a multi-machine service, you would get an error, because it will not find a property named LOC.
Adding the Owner’s Short Username to a Custom Hostnaming Scheme
One additional function you can use that we did not explore in our example is adding an owner’s short username (without the domain and backslash) as a part of the hostname. To do this, you can simply specify one additional property, Custom.Common.Hostname.OwnerShortNameIdentifier. Set the value of this property to the identifier you will use in your hostname string to specify where to place the username. Here’s an example Build Profile created for this scenario:
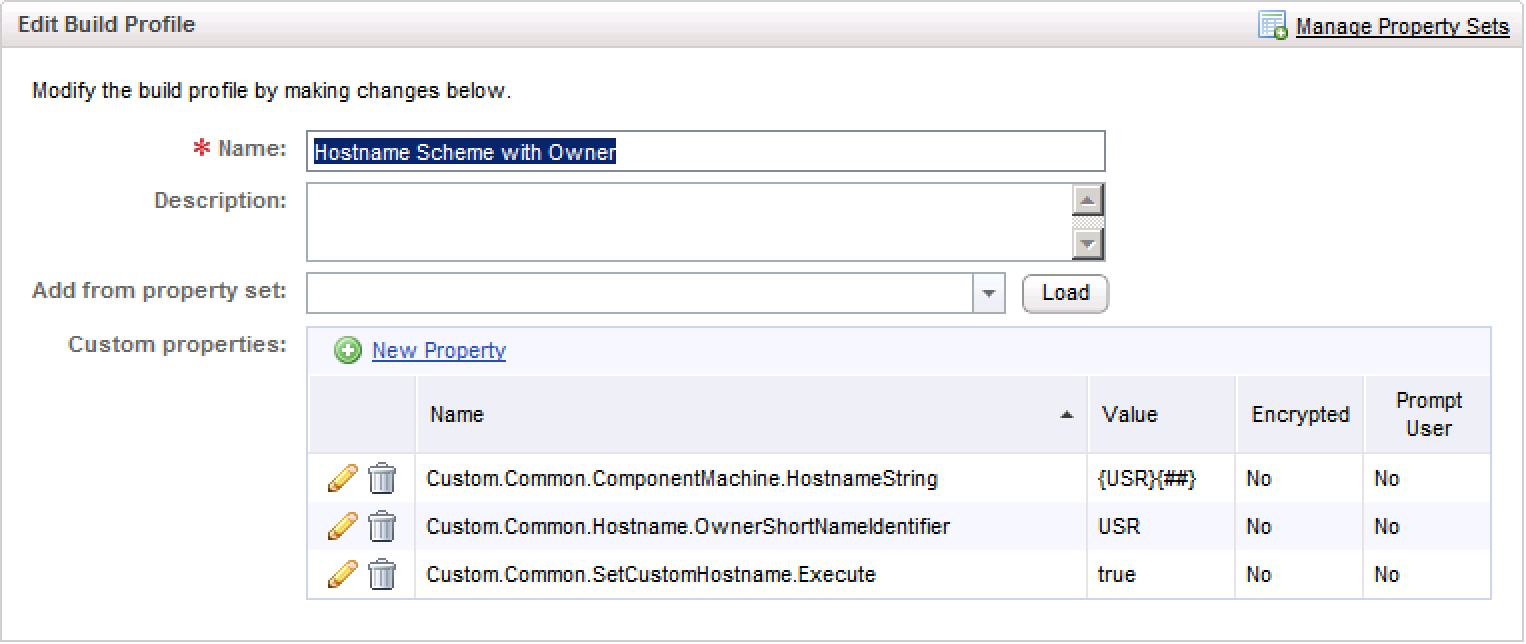
If I logged in as CORP\Administrator and requested a machine from a Blueprint with this scheme enabled, and assuming that I have already provisioned 27 instances, leaving the next index as 28. I could expect the machine to be named like this: